Intents on Android using API 26 to open PDF documents.
Recently, the Google Play store updated its requirements so the target API level of 26 was used to get new apps submitted. While this was reasonably easy to achieve through updating the AndroidManifest.Template, the change to the newer API changed the behaviour of my application.
Before the update, I would download a file to the CachePath and then share to a public folder. I would then get a URI for the public folder path file and share via Intents. Following the update, this no longer worked. After a little research, I discovered this was due to the changes in the Android security system, that actually, make a lot of sense. Rather than sharing the file outside the application, you now provide tempory access to it via the Intent. To achieve this, you need to setup a Provider, (this is done via XML) and then programmatically provide the path as a ‘content://’ URI, set flags for allowing read / write access via the intent and share it.
The video shows how to achieve this and demo’s the working code. To help, below are some of the XML blocks you will need upon the way.
Adding Provider
Add this to the AndroidManifest.template in the source code root folder, before the </application> tag. This is then used to build all Android apps.
Jim Mckeeth recently recorded a developer skill sprint showing how to use In App purchase on Android and iOS.
Using the Capitals Quiz demo that ships with RAD Studio and Appmethod, he covered common scenarios of how to use in-app purchases to disable adverts, to purchase additional items, restore purchases that had been made on another device and also consume a purchased item, all using common code that works across Android and iOS.
An application license key ID (which is very long and may need splitting over two lines) – You need to upload your app to the Google Play store first (recommended as alpha) to get this key and then you can re-upload later on.
Unique product ID’s – which point to Managed products online
To create a key store and set this to be used in the Project Options.
(and also a number of other steps.. e.g setting up merchant account)
On iOS (iTunes)
You need / see
From the developer portal, you need the AppID (non wild card version) and need to ensure the App has InApp purchases enabled.
Use iTunes connect to create the purchase item, including setting price Tier
Add language and display name for the purchase, and also add in screen shots to show what happens.
Once setup you can call
InAppPurchase.PurchaseProduct() and pass in the ID for the product to purchase a product.
Define an InAppPurchase.OnPurchaseComplete event to define what happens once an item is purchased.
Following on from the iOS specific session that spoke about iOS and talking to Objective C API’s, Jim McKeeth has done a session on Java and the JNI (Java Native Interface) bridge to the Java API’s.
He speaks about conditional defines and how to use JNI to speak to a custom set of Java Libraries. While mainly in Object Pascal, the same technique is used to access via C++ and demos are done in both language.
The video covers the creation of class methods and regular methods that are then used with the TJavaGenericImport class to bring them all together ready for importing. (A walk through is also provided on DocWiki)
The example in the video covers a string being Base64 encoded using a JNI call. For the steps to create the custom classes.dex file you can also see Jim’s blog post at http://delphi.org/2014/07/custom-classes-dex/
In this blog I want to take you through the steps for getting your Android device working with the standard USB device drivers, including steps to follow to check if what you have done has worked.
Jim McKeeth did a blog post a while back about installing custom specified Android devices that is worth reading if your device does not work with the standard drivers, however I would recommend trying this first.
Developer mode Enabled?
When you plug in your Android device, you will need to ensure you have enabled developer mode and confirmed that you want to enable USB Debugging. Under “Setting”, you should be able to see
{ } Developer options
as a menu item. If you don’t, tap “About phone” menu item 5 times to start the messages about going into developer mode.
It is also worth checking at this point that “USB Debugging” is enabled under developer options. You will still need to confirm on the phone when you finally have it all setup and you plug the phone in for the first time, but this is the first steps.
Phone drivers installed?
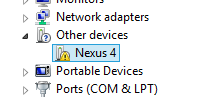
On windows, you need to have the drivers installed for the phone to enable it for developer work. Once you plug the device in, check the device manager. If it shows under Other Devices with a yellow alert, then you will need to update the drivers.
Nexus 4 showing in Device Manger when its not installed correctly
You can download the drivers if you search the web for them and point to those, or you can download and install them easily with the Android SDK Manager.
Launching the Android SDK Manager
To launch the Android SDK Manager, first open a command prompt and navigate to the android SDK tools folder. With Appmethod / RAD Studio they will be installed by default in the public documents. You can reach them using the cd command. e.g.
cd \Users\Public\Documents\Embarcadero\Studio\14.0\PlatformSDKs\adt-bundle-windows-x86-20131030\sdk\tools
From the SDK tools folder type in Android and hit enter and the SDK manager will open.
Installing the USB Drivers
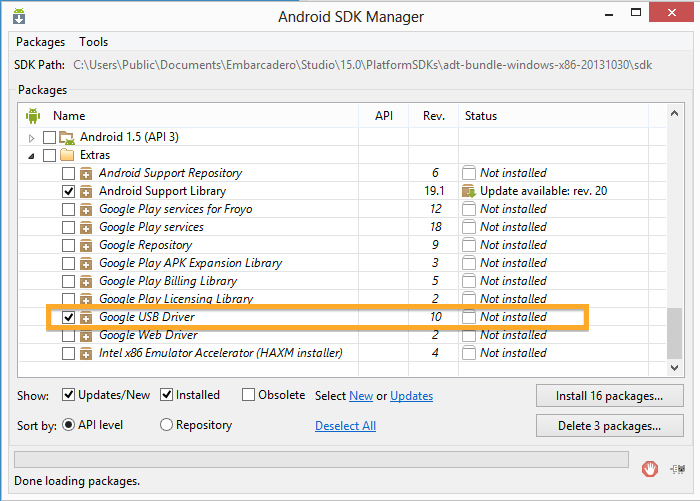
With the Android SDK Manager launched you can now see the packages installed / to update. Specifically we are looking for the Google USB Driver. (see image below) Once found, choose “Install xx packages” button at the bottom of the screen.
Android SDK Manager, USB Drivers ready to update
Note: If you don’t see it, then install any packages that are pending update, close and re-open. It should then connect back to the Internet and refresh the list and make the Google USB Driver visible ready to install.
Updating the device driver
Once you have the drivers on your machine, the next step is to update the driver back in the device manager.
Update Driver in Device Manager
Choose to browse the computer and go back to the PlatformSDKs folder (path above) and choose to search sub folders.
Set path to find Android SDK for Appmethod / RAD Studio
If you have not already said to “always trust” google inc. You should see immediately be asked to confirm installing the driver.
Confirm Install
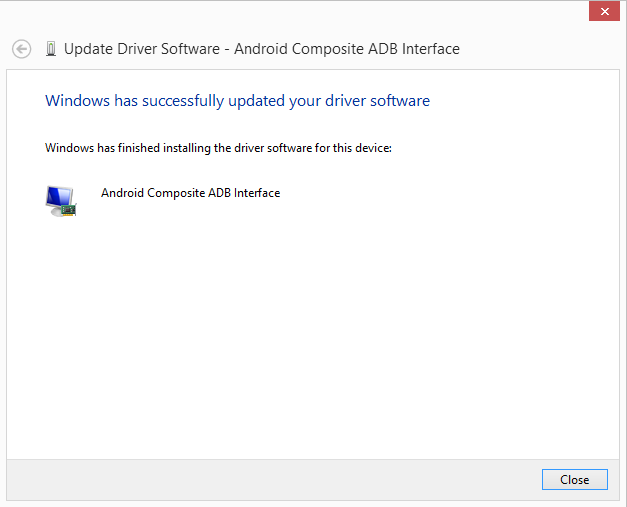
Once installed the Android Composite ADB Interface driver will be installed and you will get confirmation.
Confirmed, Driver Installed
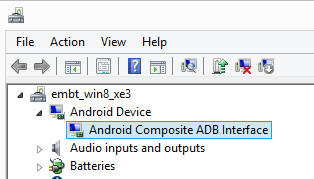
At this point, you should be able to see in the device manager the device is installed.
Android Device Installed
With the phone drivers installed, it is now time to check the ADB command line can see your device. If it can, then you are ready to use it for development.
Checking ADB can see your Android device
To check that ADB can see your device, its time to head back to the command line and run the ADB application. ADB.exe lives in the ..sdk\platform-tools folder. From the command line you should be able to get there with something like…
cd \Users\Public\Documents\Embarcadero\Studio\14.0\PlatformSDKs\adt-bundle-windows-x86-20131030\sdk\platform-tools
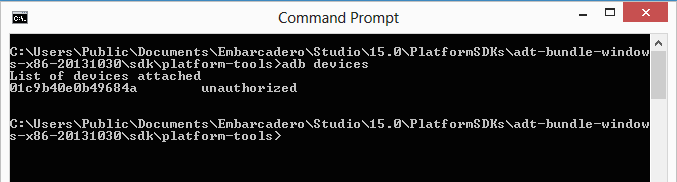
Once your command prompt window is open at Platform Tools, run the following command to view the connected devices.
adb devices
The following screen below shows the output. Here I have my android device connected, but as yet I have not confirmed the connection on my phone as being allowed This causes the device to show as unauthorized.
Un-authroised Device
If the android device shows as unauthorized then unlock the phone and choose to Allow USB debugging.
Approving Debugging for Android
Once the device is approved, you should be able to re-run the ADB devices command and see the device id nows shows the status of “device”
ADB for approved device
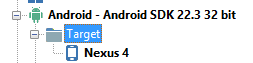
At this point you are ready to use your android device for development! Refresh your Android devices in your IDE (right click on Android as a Target platform in the Project Manager and it will become visible.
Programming with Delphi & InterBase
This website uses cookies to improve your experience. We'll assume you're ok with this, but you can opt-out if you wish.AcceptRead More
Privacy & Cookies Policy
Privacy Overview
This website uses cookies to improve your experience while you navigate through the website. Out of these, the cookies that are categorized as necessary are stored on your browser as they are essential for the working of basic functionalities of the website. We also use third-party cookies that help us analyze and understand how you use this website. These cookies will be stored in your browser only with your consent. You also have the option to opt-out of these cookies. But opting out of some of these cookies may affect your browsing experience.
Necessary cookies are absolutely essential for the website to function properly. This category only includes cookies that ensures basic functionalities and security features of the website. These cookies do not store any personal information.
Any cookies that may not be particularly necessary for the website to function and is used specifically to collect user personal data via analytics, ads, other embedded contents are termed as non-necessary cookies. It is mandatory to procure user consent prior to running these cookies on your website.